

- Messages
- 1,149
- Classified ads
- 3
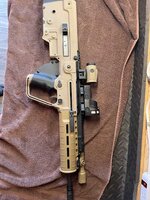
So I have been wanting to do this for awhile but could never find a good example. So after reading a lot and looking at pics I did the mod myself and am posting here so others can have a detailed example for themselves.
So double checking your rifle is clear and unloaded, you will need to disassemble it. There are plenty of YouTube videos on complete disassembly of the Tavor X95.
But, you will first:
Step 1. Remove bolt and trigger pack
Step 2. Remove pistol grip.
Step 3. Remove bolt holding forend, pull off.
Step 4. Most important, remove charging handle.
Step 5. Ensure charging handle is in fact removed before proceeding to turn barrel lock or you WILL damage charging handle and gas tube.
Step 6. Revove barrel assembly, pull out, top rail will come out attached to barrel.
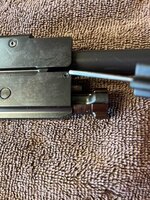
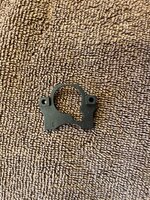
Step 7. Locate charging rod guide, piece of plastic. First pic. And remove it, slides off gas tube.
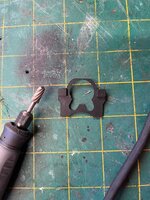
Step 8. Mod plastic guide rod piece as shown. Use lower speed to remove material, not melt it.
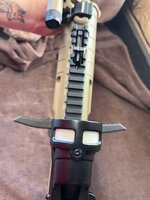
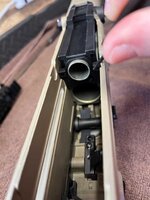
Step 9. Remove roll pin from bolt carrier group. This roll pin is in place to prevent a single side charging handle from slipping into the wrong spot and bending. If you were to change charging handle from left side to right side you would put the roll pin in opposite side; since we are running two, you just remove roll pin completely and each charging handle rod prevents this.
Step 10. Insert both charging handles and reassemble rifle.
So double checking your rifle is clear and unloaded, you will need to disassemble it. There are plenty of YouTube videos on complete disassembly of the Tavor X95.
But, you will first:
Step 1. Remove bolt and trigger pack
Step 2. Remove pistol grip.
Step 3. Remove bolt holding forend, pull off.
Step 4. Most important, remove charging handle.
Step 5. Ensure charging handle is in fact removed before proceeding to turn barrel lock or you WILL damage charging handle and gas tube.
Step 6. Revove barrel assembly, pull out, top rail will come out attached to barrel.
Step 7. Locate charging rod guide, piece of plastic. First pic. And remove it, slides off gas tube.
Step 8. Mod plastic guide rod piece as shown. Use lower speed to remove material, not melt it.
Step 9. Remove roll pin from bolt carrier group. This roll pin is in place to prevent a single side charging handle from slipping into the wrong spot and bending. If you were to change charging handle from left side to right side you would put the roll pin in opposite side; since we are running two, you just remove roll pin completely and each charging handle rod prevents this.
Step 10. Insert both charging handles and reassemble rifle.
Attachments
Last edited: